Introduction
Accessing and downloading Amazon reports directly into Google Sheets can significantly streamline your workflow. This video tutorial guides you through using SellerSheet to request, track, and download reports like Inventory, Orders, and Tax reports with ease.
Prerequisites
- Store Authorization: Ensure you have authorized your Amazon store on the SellerSheet Dashboard.
- Sidebar Installed: You need the SellerSheet Google Sheet sidebar installed. If not, follow the Onboarding Guide.
Step 1: Open the Reports Spreadsheet
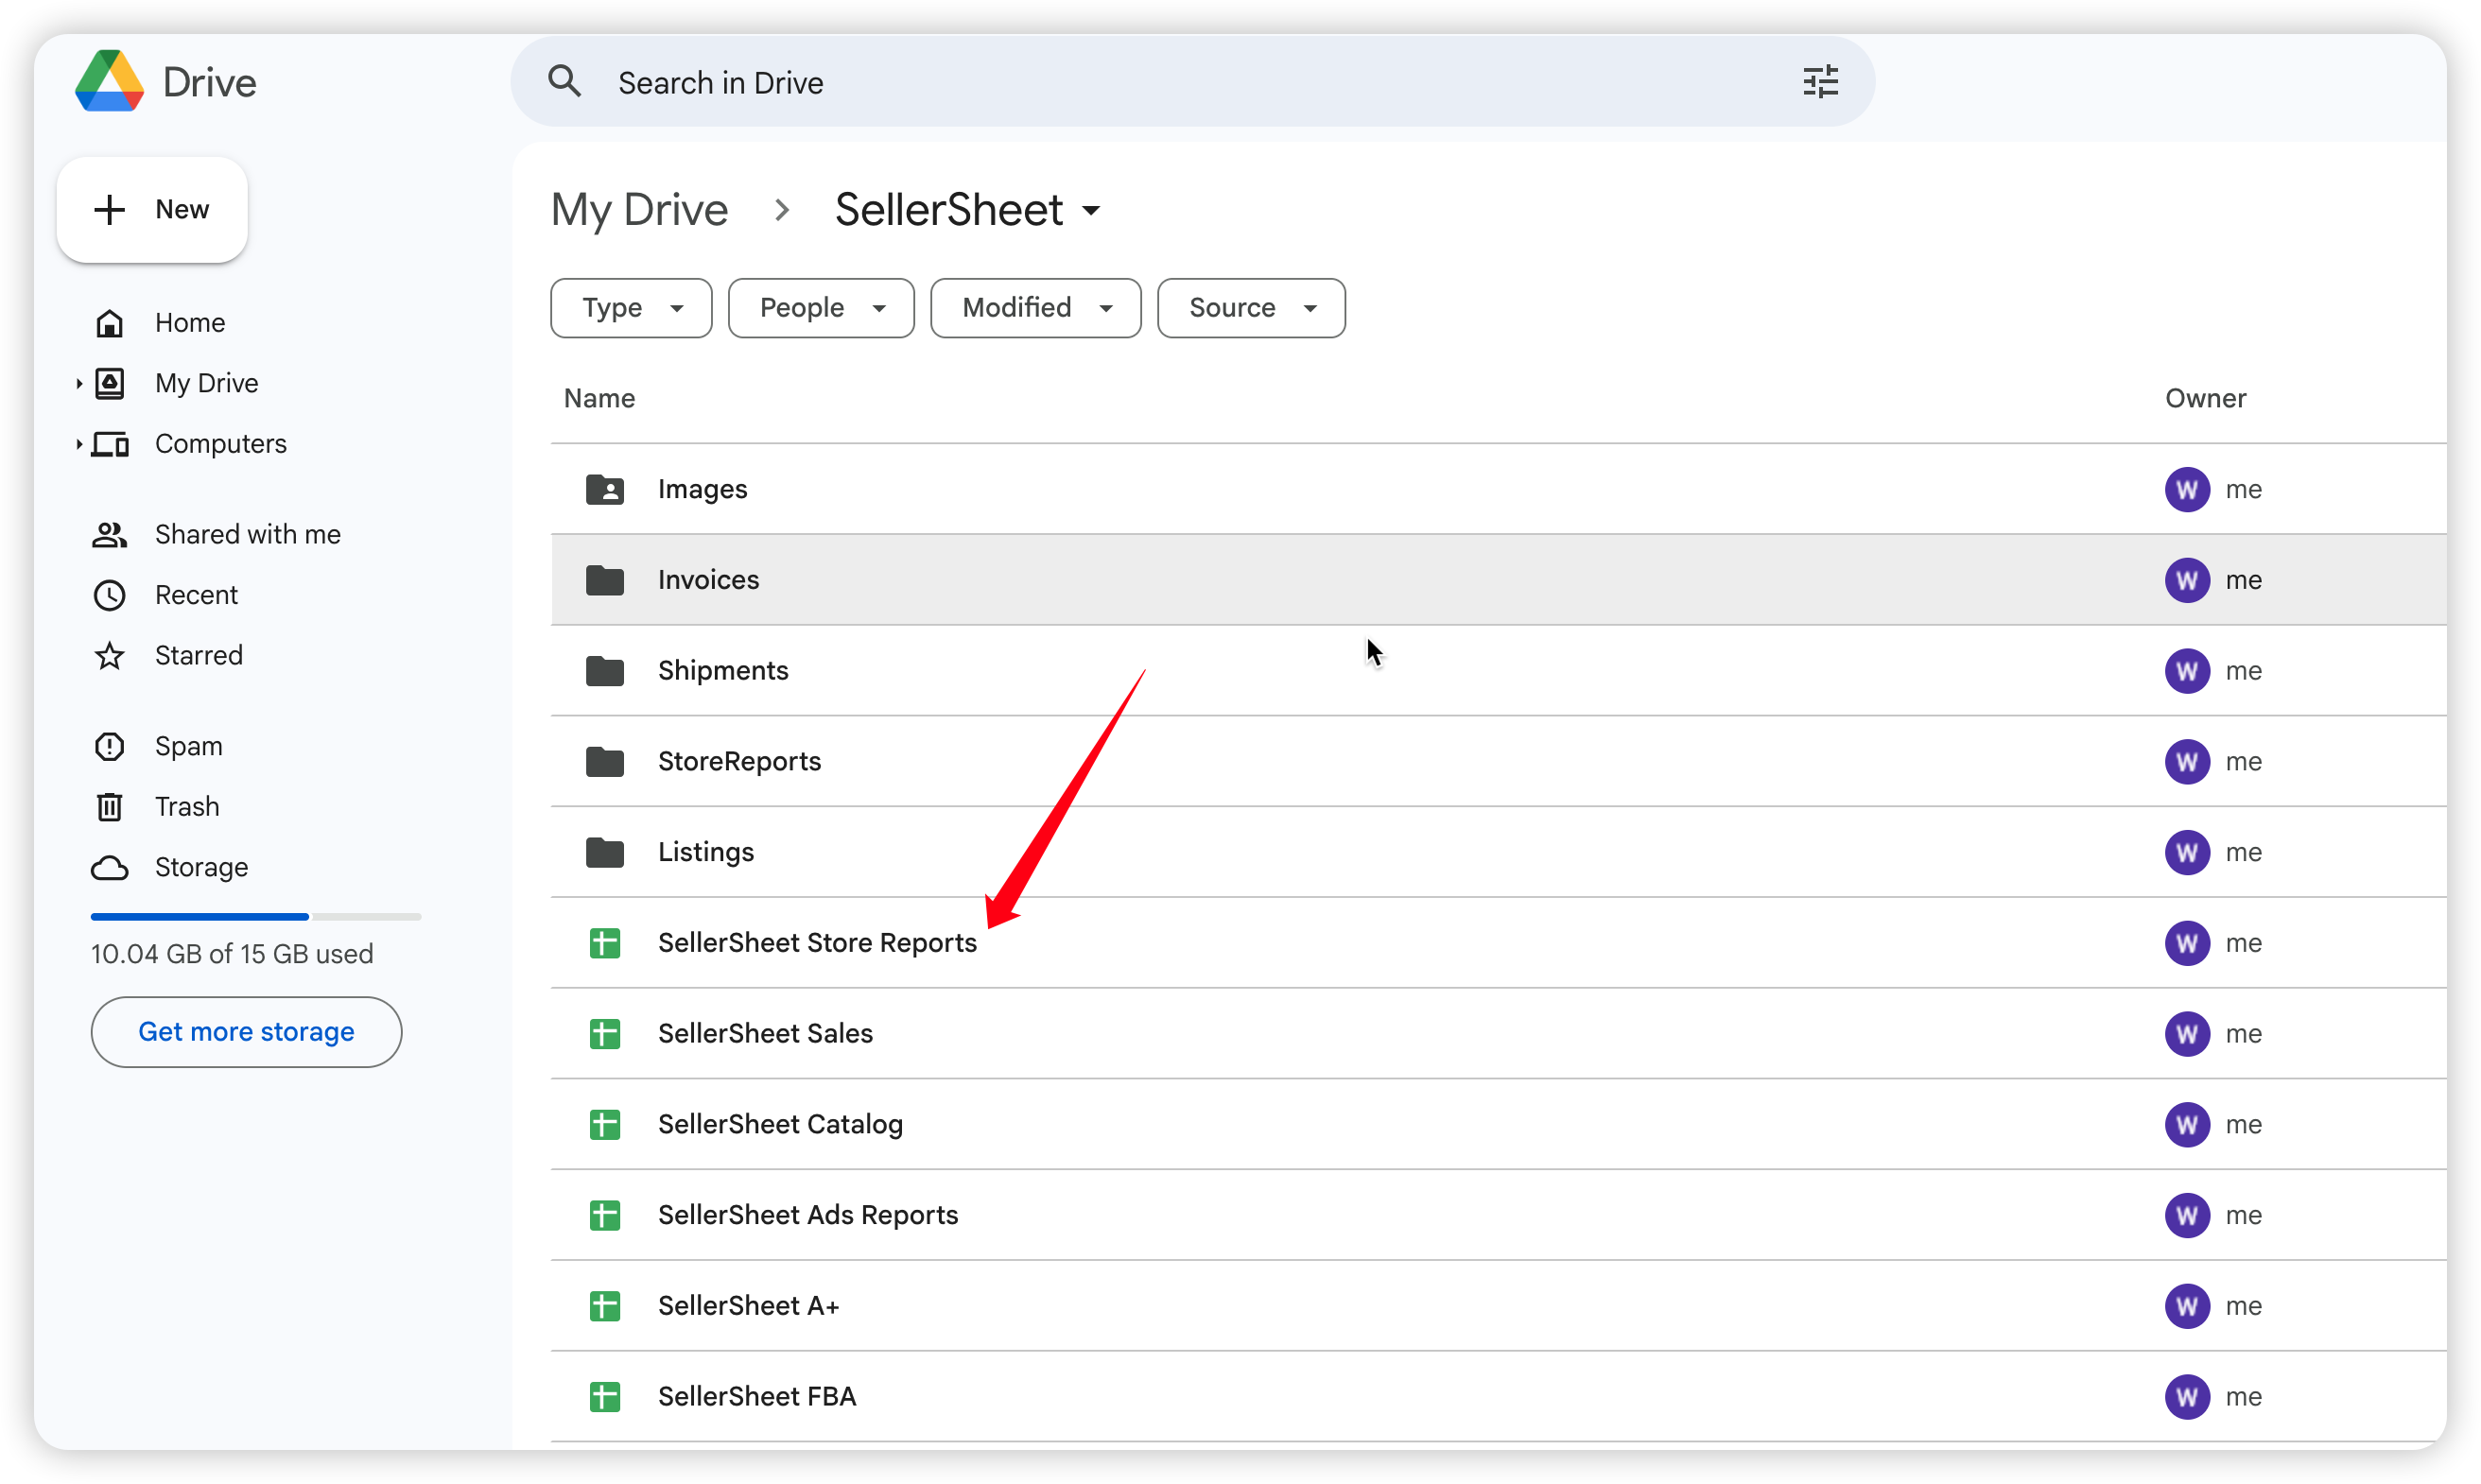
You need to access the Store Reports spreadsheet. You can find this in two ways:
- Go to your Google Drive root folder and look for the SellerSheet folder.
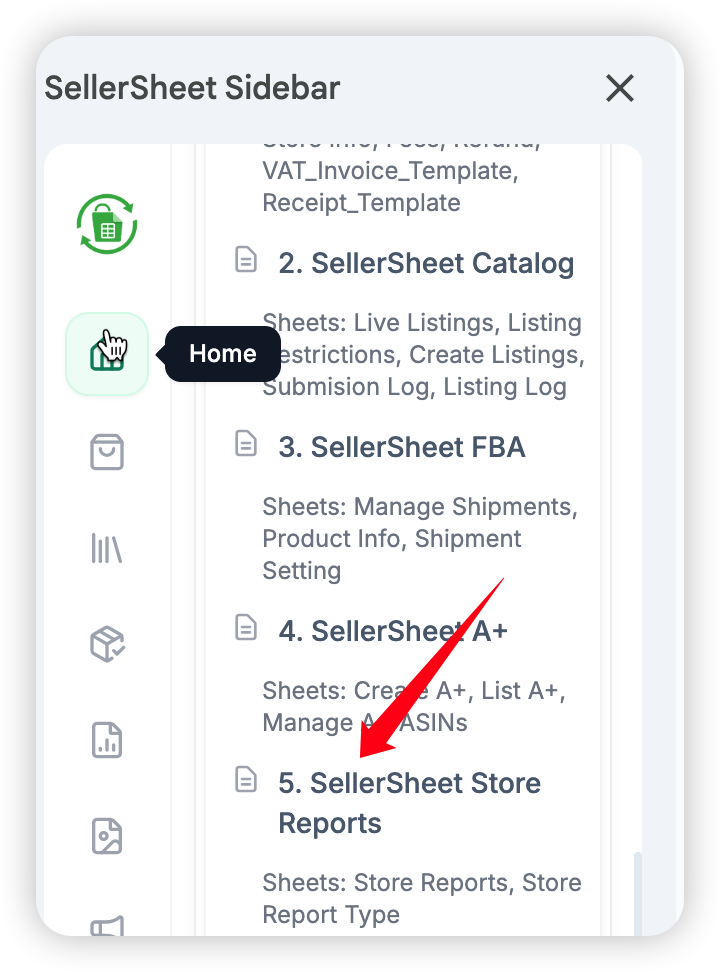
- Or, open the SellerSheet sidebar, go to the Home tab, expand the My Resources section, and look for the Store Reports spreadsheet.
Step 2: Configure Your Report
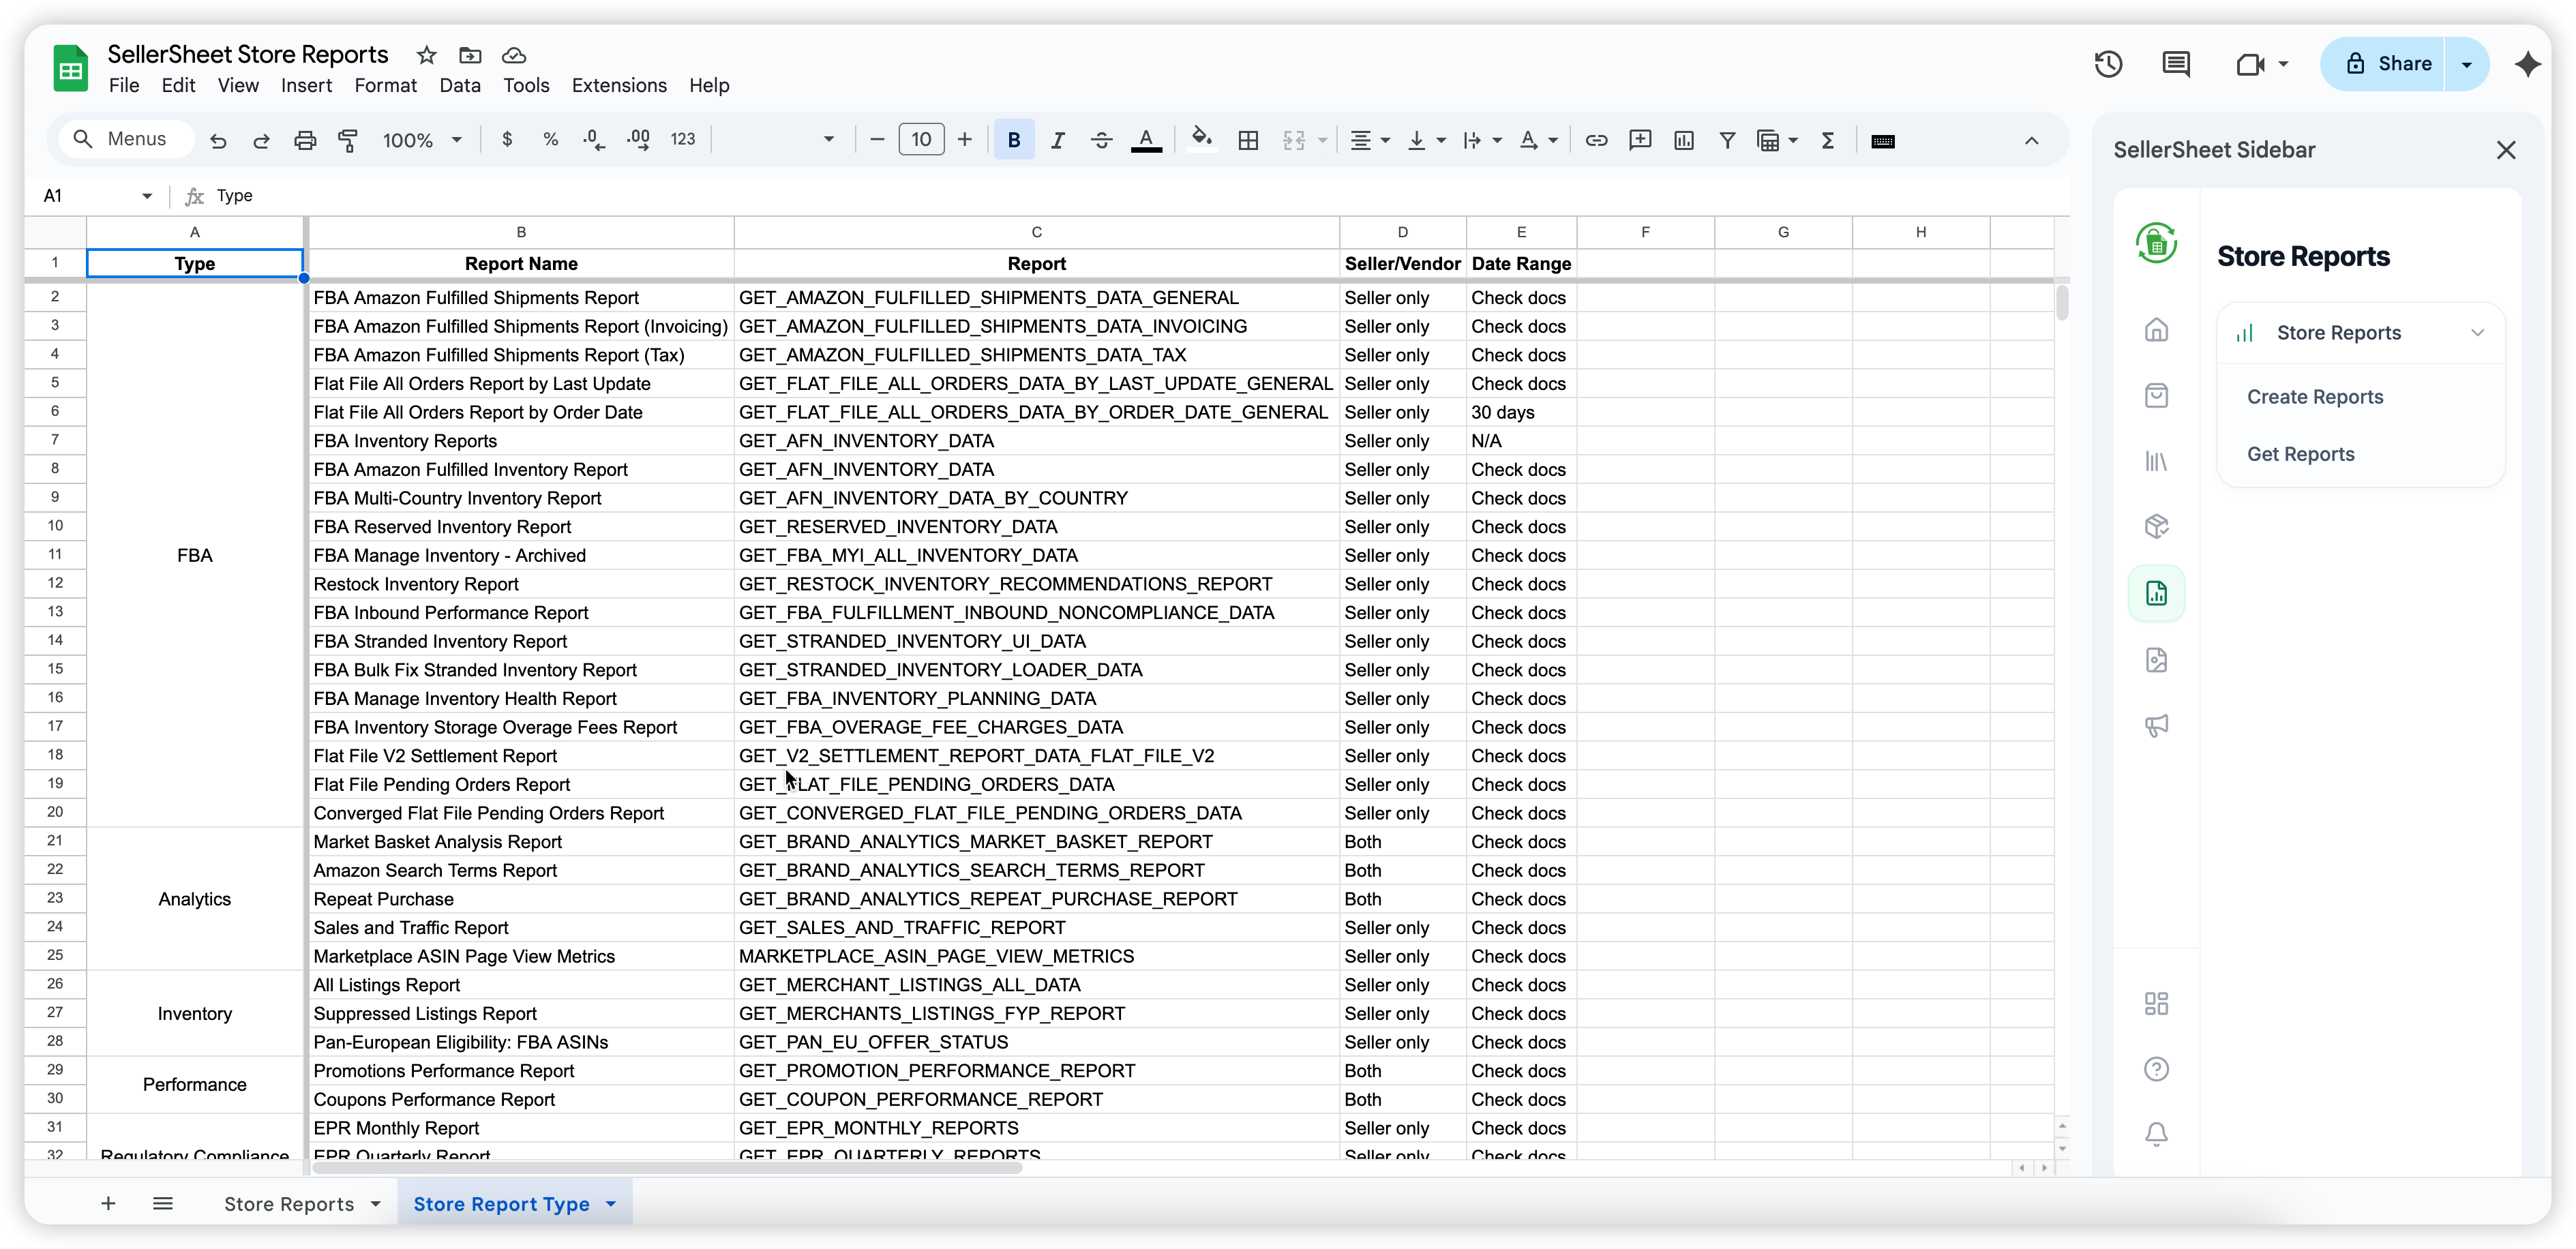
In the spreadsheet, navigate to the Store Reports sheet. This is where you configure report requests.
Understanding Column Colors
| Yellow | Required | Must be filled (e.g., Store, Report Name). |
| Light Yellow | Optional | Optional or conditional (e.g., Data Start/End Time). |
| Gray | Auto-Filled | Do not edit. System fills these (e.g., Report ID, Status). |
Pro Tip: Bulk Processing
You don't have to do this one by one! You can fill out multiple rows with different reports or stores. When you click Create Reports or Get Reports, SellerSheet applies the action to all valid rows in the active sheet simultaneously.
Filling the Data
- Get Report Name: Switch to the Store Report Type sheet to find a list of available reports. Copy the exact Report Name of the report you want.
- Paste Report Name: Go back to the Store Reports sheet and paste it into the Report Name column.
- Enter Store: Fill in the Store column. This must be the Store Name you used on the dashboard plus the Country Code (e.g., if your store name is "SS" and region is UAE, enter
SS-AE). - Time Frame (Optional): If the report requires a specific date range (like 30 days), fill in Data Start Time and Data End Time.
Step 3: Create Reports
Once your rows are configured:
- Open the sidebar and go to the Store Reports tab.
- Click Create Reports.
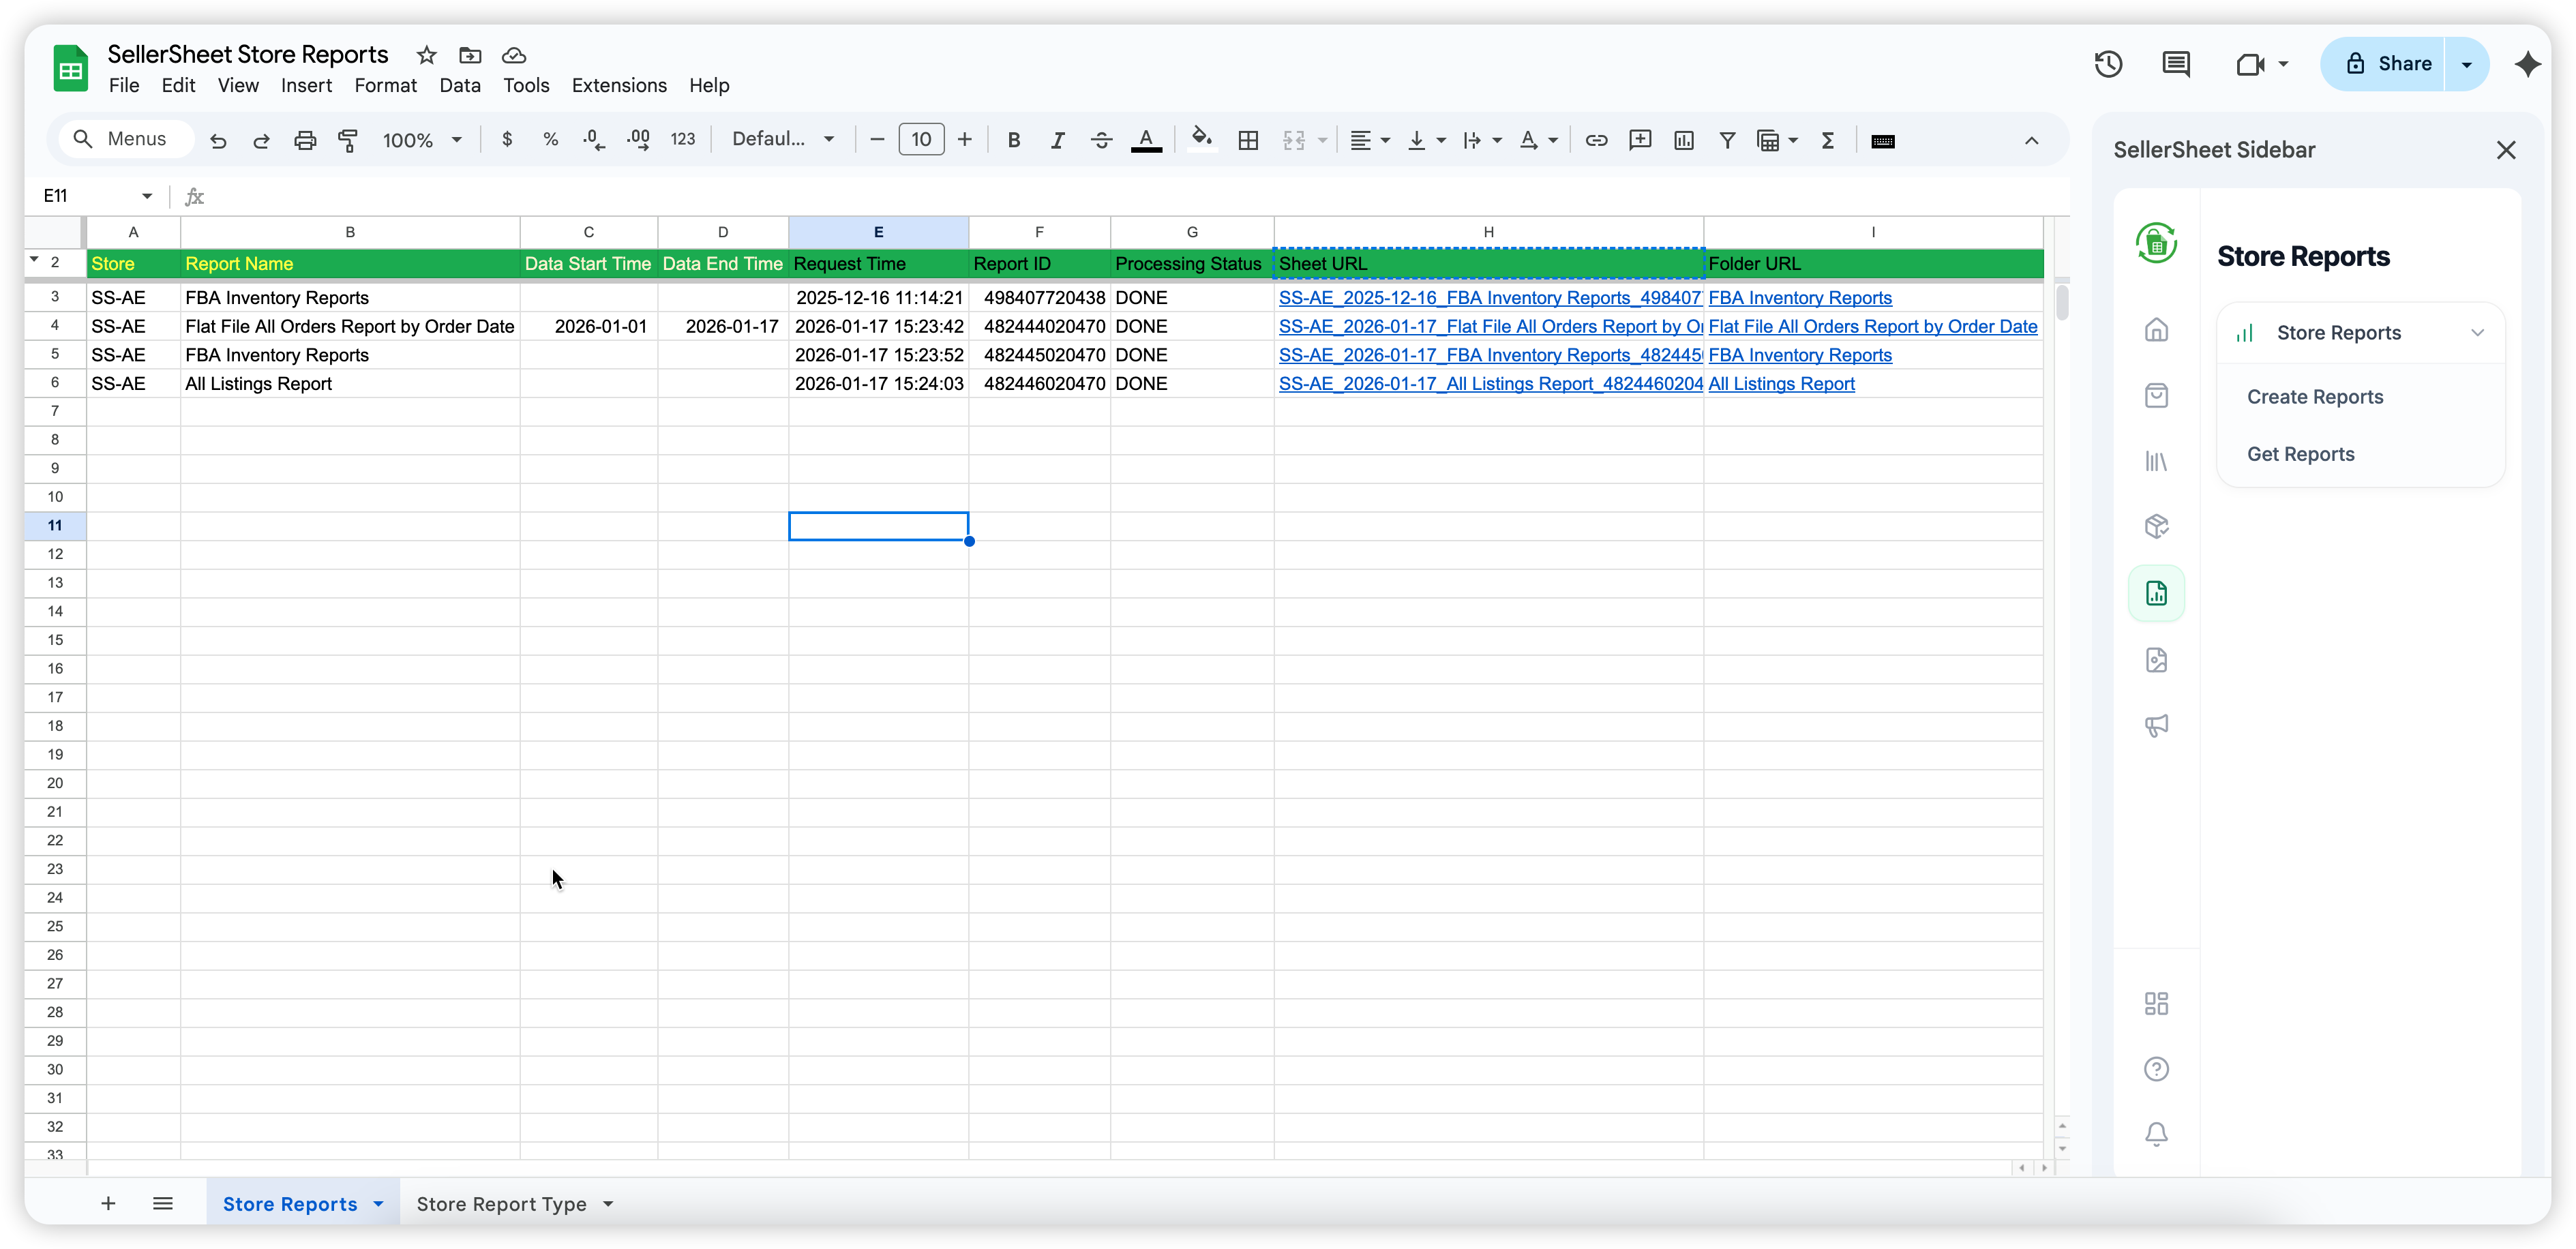
SellerSheet will send the request to Amazon. If successful, it will automatically fill the Request Time and Report ID columns. If a Report ID already exists for a row, it will be skipped.
Step 4: Get Reports
After requesting reports, you need to check their status and download them:
- Click Get Reports in the sidebar.
- SellerSheet will check the status of each Report ID with Amazon.
Processing Status Meanings
- IN_QUEUE / IN_PROGRESS: Amazon is still preparing the report. Try again later.
- DONE: Report is ready. SellerSheet will download it to your Drive in
SellerSheet/StoreReports/{Report Name}. - CANCELLED: Usually means the report contains 0 data and Amazon cancelled it.
- FATAL: Error in request (e.g., incorrect Report Name or missing required Time Frame).
Once DONE, the Sheet URL and Folder URL columns will automatically populate with hyperlinks to your new report file.
Important Notes
- Active Sheet Scope: Both "Create Reports" and "Get Reports" apply to the active sheet. This means they will process all valid rows in the current sheet you are viewing.
- Skipping Logic: "Create Reports" skips rows that already have a Report ID. "Get Reports" skips rows where status is already DONE, CANCELLED, or FATAL, or if the Sheet URL already exists.