Introduction
Amazon A+ Content (formerly Enhanced Brand Content / EBC) lets brand-registered sellers add rich media — images, comparison charts, and formatted text — to their product detail pages. Well-designed A+ Content can increase conversion rates by 3–10%.
The problem? Seller Central's A+ editor is slow and tedious, especially when you need to create or update content across dozens of ASINs. There's no way to bulk-create modules or reuse templates efficiently.
SellerSheet handles the entire A+ Content workflow from Google Sheets. Define your content modules in a spreadsheet, load images from Google Drive, submit to Amazon, and manage ASIN assignments — all from the sidebar. This guide covers the 3 key sheets: Create A+, List A+, and Manage A+ ASINs.
Create A+
Define modules & content
Submit
Load images & publish
Manage ASINs
Assign & revise ASINs
List A+
Review & track status
Prerequisites
- Store Authorization: Authorize your Amazon store on the SellerSheet Dashboard.
- Sidebar Installed: Install the SellerSheet sidebar add-on. See the Onboarding Guide.
- Brand Registry: Your Amazon Seller Central account must be enrolled in Amazon Brand Registry to access A+ Content.
- Product Images: Prepare your A+ content images in a Google Drive folder. Images should meet Amazon's requirements (minimum 970px wide for most modules).
The Create A+ Sheet
The Problem
In Seller Central, building A+ Content means dragging and dropping modules one at a time, uploading images individually, and typing text into tiny input boxes. There's no way to create templates, duplicate content across ASINs, or bulk-edit modules.
The Create A+ sheet is where you define your A+ Content structure. It has two sections: a header area (rows 2–3) for content settings, and a modules area (rows 4+) where you define each content module.
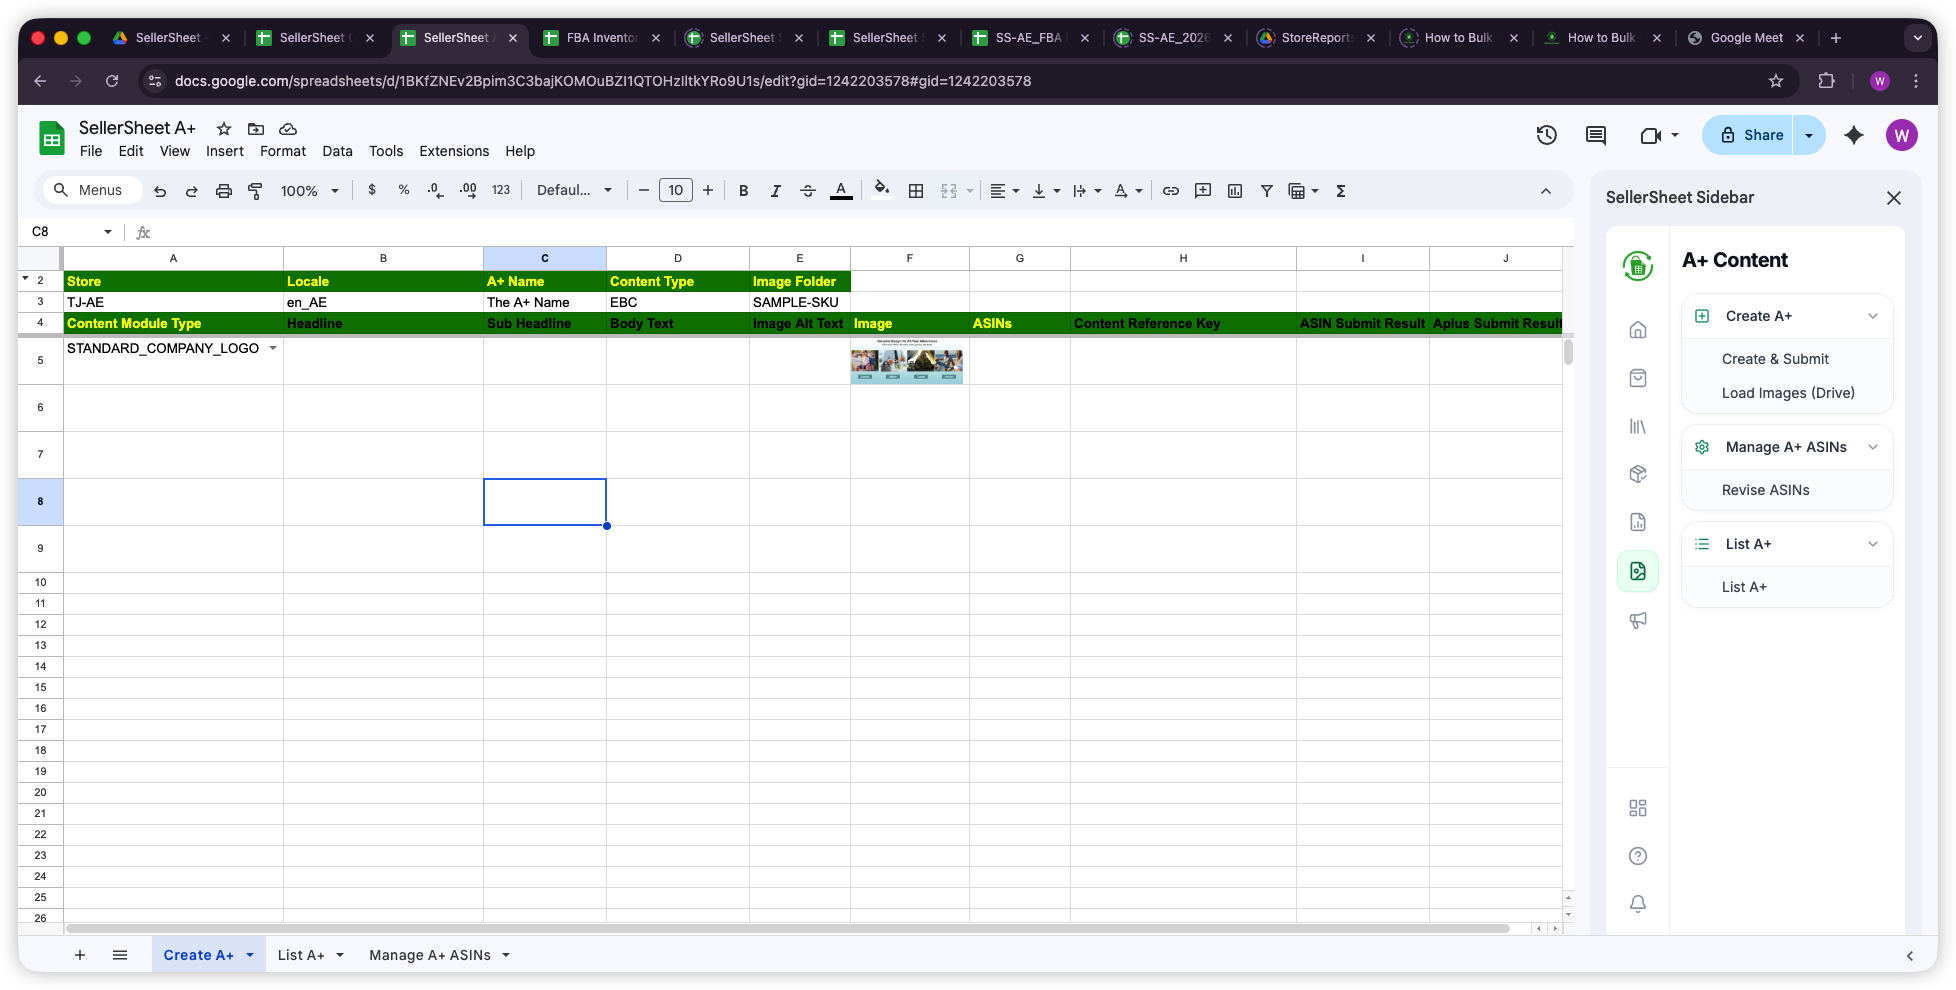
Header Settings (Rows 2–3)
The header row defines the overall A+ content settings:
Header Columns
- Store: Your store identifier (e.g.,
TJ-AE). - Locale: The language/marketplace locale (e.g.,
en_AE). - A+ Name: A descriptive name for this A+ content (e.g.,
My Brand Story). - Content Type: The content type —
EBCfor standard A+ Content. - Image Folder: The SKU or folder name in Google Drive where your images are stored (e.g.,
SAMPLE-SKU).
Content Modules (Rows 4+)
Starting from row 4, each row defines one A+ content module. The columns map directly to Amazon's A+ Content API:
Module Columns
- Content Module Type: The Amazon module type (e.g.,
STANDARD_COMPANY_LOGO,STANDARD_IMAGE_TEXT_OVERLAY,STANDARD_FOUR_IMAGE_TEXT). - Headline: The module's main headline text.
- Sub Headline: Secondary headline or subtitle.
- Body Text: The main descriptive text for the module.
- Image Alt Text: Alt text for the module's image (required for accessibility).
- Image: The image filename — loaded from Google Drive via Load Images (Drive).
- ASINs: ASINs to associate with this content (optional, can also be managed via the Manage A+ ASINs sheet).
- Content Reference Key: Auto-filled after submission — Amazon's unique identifier for this A+ content.
- ASIN Submit Result: Status of the ASIN association submission.
- Aplus Submit Result: Status of the A+ content submission.
Important: Module Types
Each module type has specific image dimension requirements. Check Amazon's A+ Content guidelines for supported module types and their image specifications.
Submitting A+ Content
Once your modules are defined in the Create A+ sheet, use the sidebar buttons to load images and submit:
1. Load Images (Drive)
Click Load Images (Drive) in the sidebar. SellerSheet reads the Image Folder value from the header and finds the matching folder in your Google Drive. It then uploads each image referenced in the Image column to Amazon's content system and fills in the image URLs.
Pro Tip: Image Organization
Create a folder in Google Drive for each A+ content set, named after the SKU or product line. Place all module images inside. The Image column only needs the filename (e.g., hero-banner.jpg) — SellerSheet finds it in the specified folder.
2. Create & Submit
Click Create & Submit in the sidebar. SellerSheet:
- Reads all content modules from the sheet.
- Constructs the A+ Content document via the Amazon SP-API.
- Submits the content for approval.
- Fills in the Content Reference Key and Aplus Submit Result columns.
If any ASINs are specified in the ASINs column, SellerSheet also submits the ASIN associations and fills in the ASIN Submit Result.
The List A+ Sheet
The List A+ sheet gives you an overview of all your existing A+ Content for a given store. Click List A+ in the sidebar to fetch and populate the data.
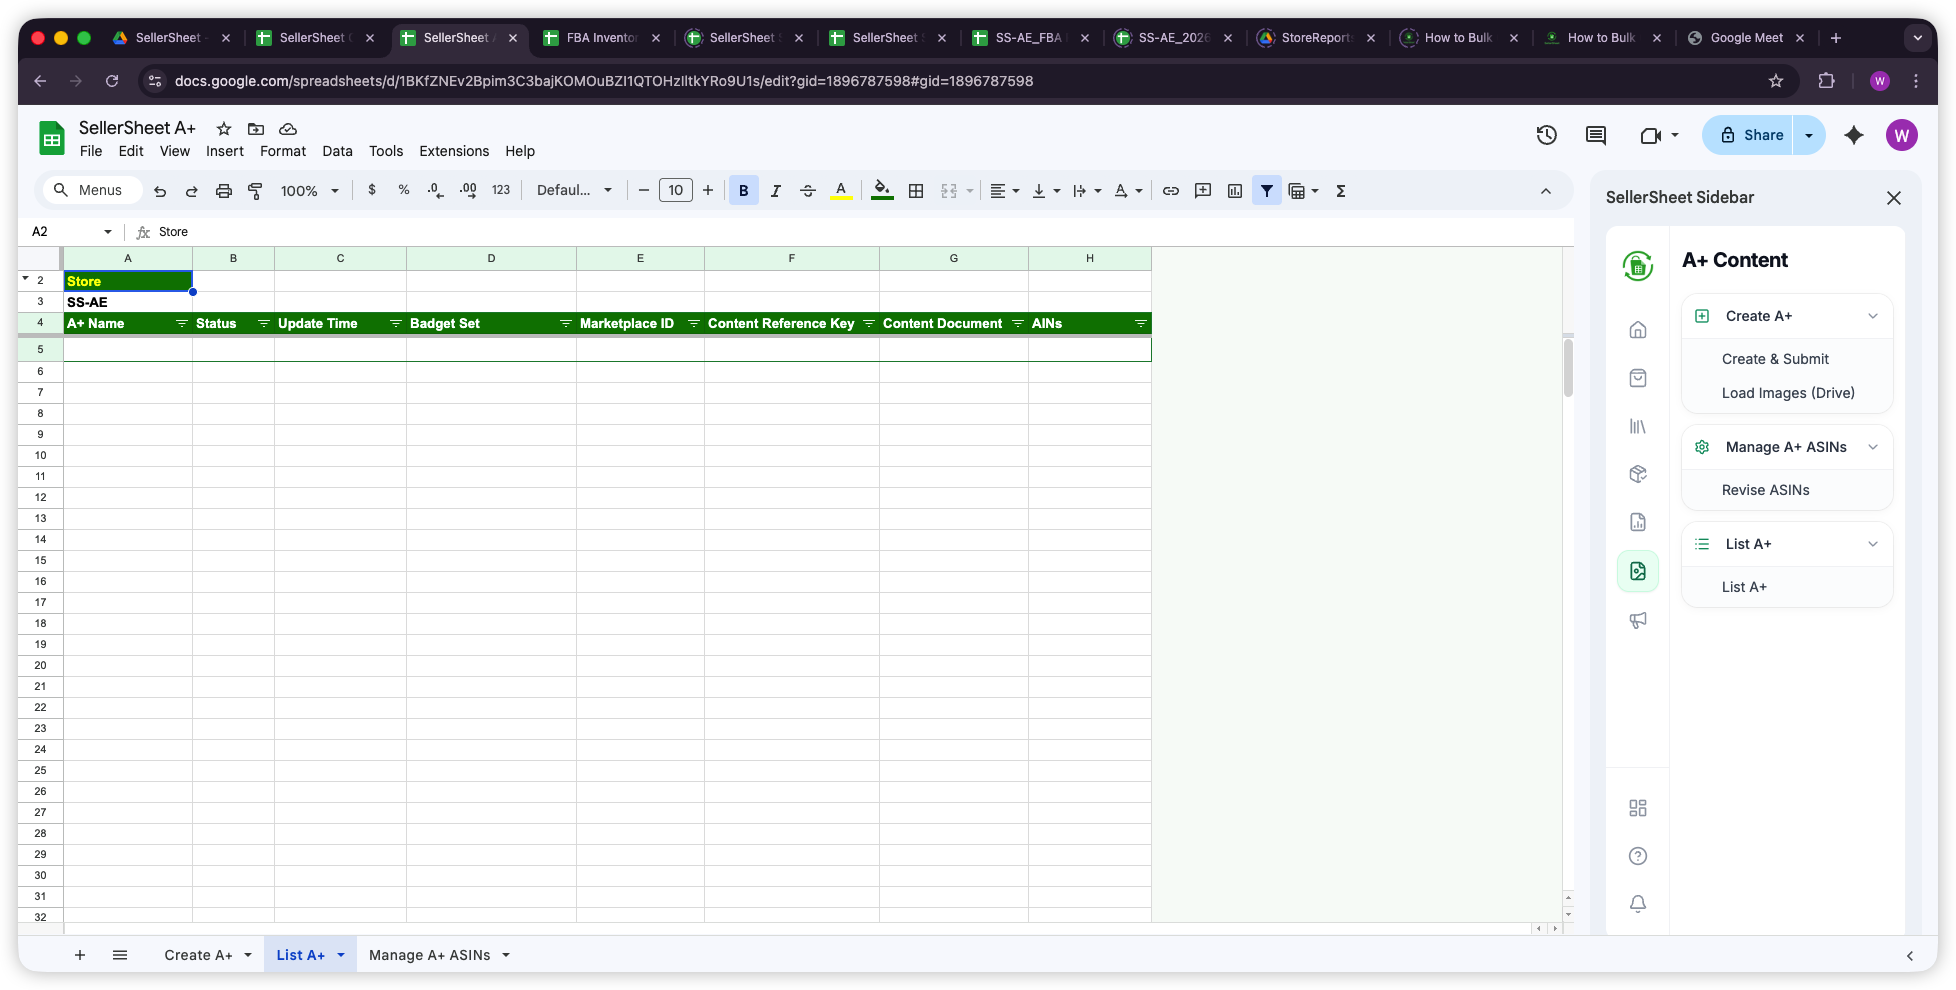
List A+ Columns
- Store: The store row header (e.g.,
SS-AE). - A+ Name: The name you gave when creating the content.
- Status: Current approval status (e.g.,
APPROVED,DRAFT,REJECTED). - Update Time: Last modification timestamp.
- Badge Set: Any badges associated with the content.
- Marketplace ID: The Amazon marketplace identifier.
- Content Reference Key: Amazon's unique identifier — use this to manage ASINs for this content.
- Content Document: The full content document data.
- ASINs: ASINs currently associated with this A+ content.
Pro Tip: Content Reference Key
Copy the Content Reference Key from the List A+ sheet and paste it into the Manage A+ ASINs sheet to quickly assign ASINs to existing content.
Managing A+ ASINs
The Problem
In Seller Central, associating A+ Content with ASINs means opening each content, searching for ASINs one by one, and applying them individually. If you need to apply the same A+ content to 50+ ASINs, it takes forever.
The Manage A+ ASINs sheet lets you bulk-assign and revise ASIN associations for your A+ content. Fill in the store, content reference key, and ASINs, then submit with one click.
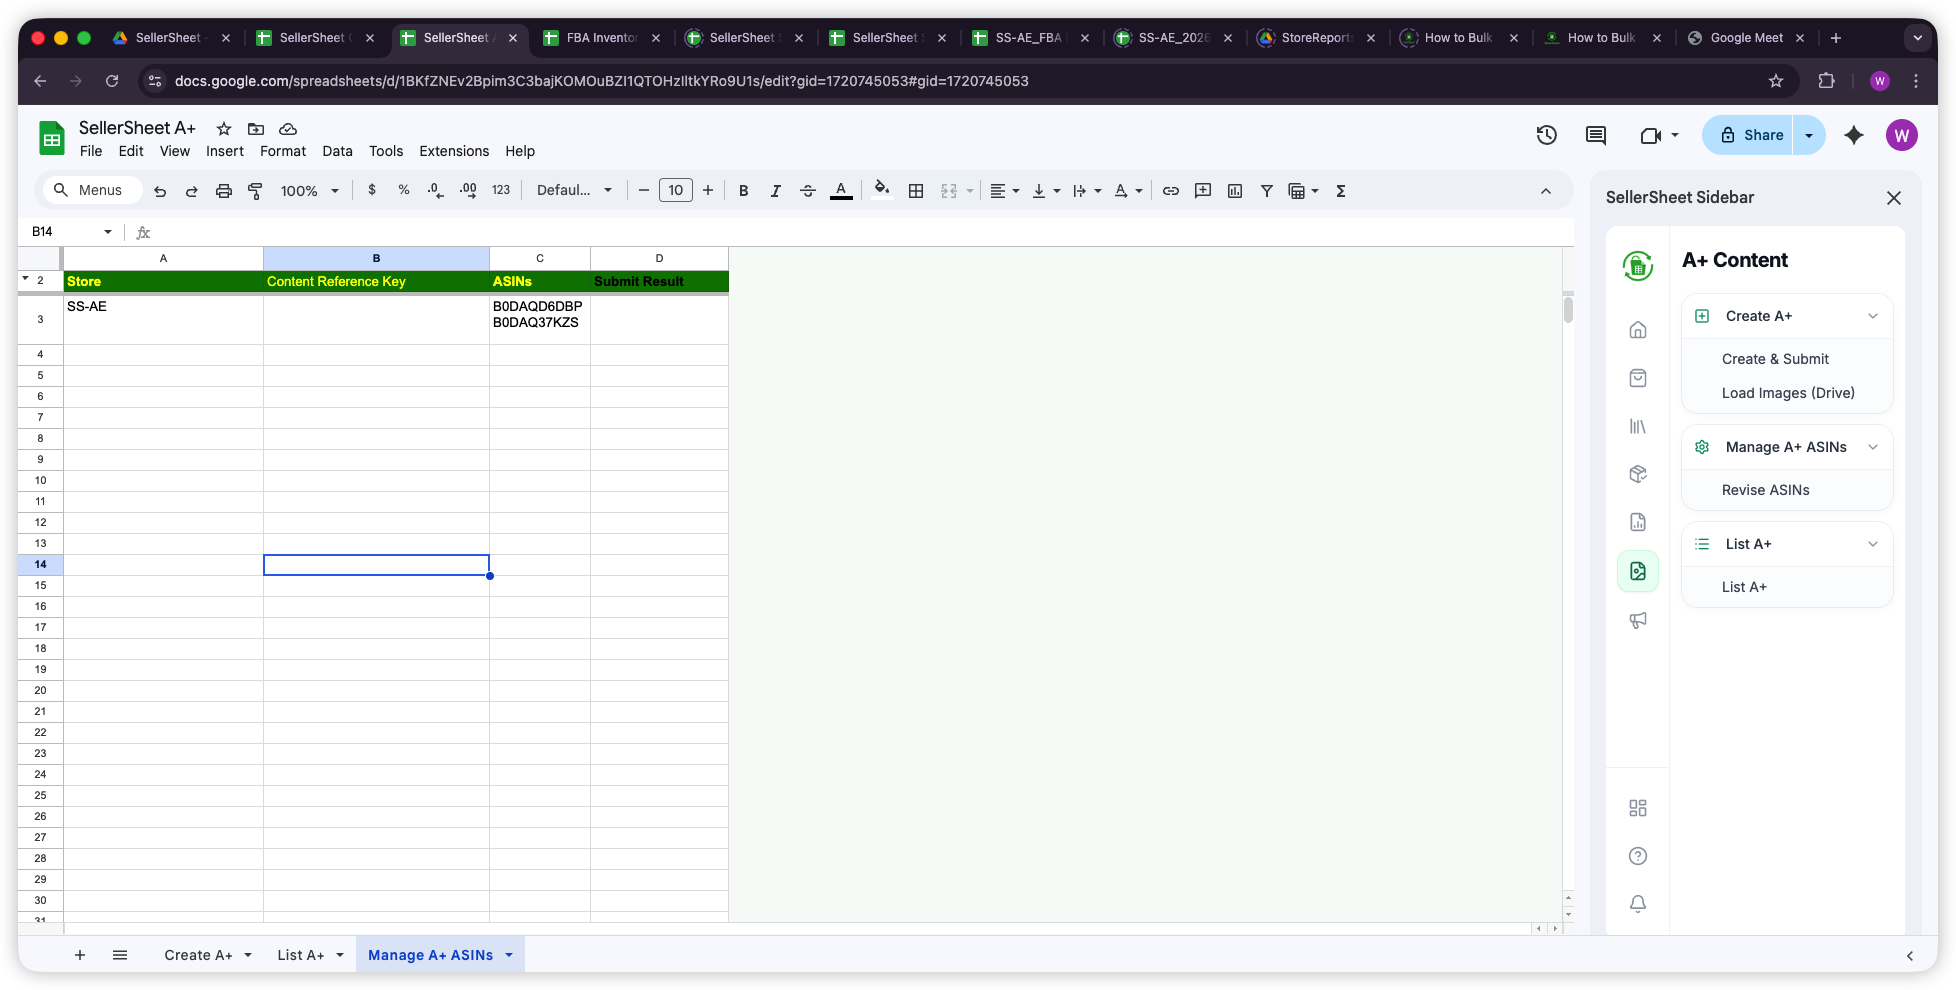
Manage A+ ASINs Columns
- Store: Your store identifier (e.g.,
SS-AE). - Content Reference Key: The A+ content identifier from List A+ or Create A+ results.
- ASINs: One or more ASINs to assign, each on a new line within the cell (e.g.,
B0DAQD6DBPandB0DAQ37KZS). - Submit Result: Auto-filled with the submission status after clicking Manage A+ ASINs or Revise ASINs.
Manage A+ ASINs vs. Revise ASINs
The sidebar offers two actions under Manage A+ ASINs:
- Manage A+ ASINs — Assigns ASINs to the specified A+ content. Use this for the initial ASIN association or to add new ASINs.
- Revise ASINs — Updates/replaces the ASIN assignments for existing A+ content. Use this when you need to change which ASINs are associated with a content reference key.
Important: Multiple ASINs
To assign multiple ASINs, enter each ASIN on a separate line within the same cell (use Alt+Enter or Ctrl+Enter in Google Sheets to add a new line within a cell).
Complete Workflow
Here's the end-to-end process for creating and publishing A+ Content:
- Prepare images — Create a folder in Google Drive with your A+ module images.
- Fill the Create A+ sheet — Set your store, locale, A+ name, content type, and image folder in the header. Add content modules row by row.
- Load Images (Drive) — Click in the sidebar to upload images from Drive to Amazon.
- Create & Submit — Click to submit the A+ content to Amazon for approval.
- Check status — Use List A+ to verify your content status (
APPROVED,DRAFT, orREJECTED). - Assign ASINs — Fill the Manage A+ ASINs sheet with the content reference key and target ASINs, then click Manage A+ ASINs to apply.
Quick Reference
Use this table to quickly find where each action happens:
| What You Need | Action | Sheet |
|---|---|---|
| Define A+ content modules | Fill header + module rows | Create A+ |
| Upload images from Drive | Load Images (Drive) | Create A+ |
| Submit A+ content to Amazon | Create & Submit | Create A+ |
| View all existing A+ content | List A+ | List A+ |
| Assign ASINs to A+ content | Manage A+ ASINs | Manage A+ ASINs |
| Update ASIN assignments | Revise ASINs | Manage A+ ASINs |
Maximizing Efficiency
- Reuse Templates: Duplicate a Create A+ sheet tab to create variations for different product lines. Change the A+ name, images, and text while keeping the same module structure.
- Bulk ASIN Assignment: Use the Manage A+ ASINs sheet to assign one A+ content to dozens of ASINs at once — just list all ASINs in the cell with line breaks.
- Google Drive Integration: Organize your A+ images by product/SKU in Google Drive folders. The Load Images (Drive) feature pulls directly from these folders.
- Track with List A+: Regularly use List A+ to check content approval status across all your stores. Rejected content can be revised and resubmitted.
- Combine with Listings: After publishing A+ Content, manage your product listings (titles, prices, descriptions) with the Create Listings guide.