Introduction
If you've ever used Seller Central's flat file workflow to create or update listings, you know the pain: pick the right product type, download a massive Excel template, fill in dozens of required columns, upload the file, wait for the processing report, decipher cryptic error messages, fix them one at a time, and re-upload. For multiple product types or marketplaces, multiply that effort.
SellerSheet's Create Listings feature replaces this entire process with a Google Sheets workflow that's faster, more flexible, and more powerful. It supports four distinct operation types — each designed for a different seller need:
- UPDATE — Create a brand-new listing or fully rewrite all attributes on an existing one.
- PARTIAL_UPDATE — Update only the attributes you specify (title, bullet points, price, images) without touching anything else.
- PATCH — Partially modify a listing — primarily used to remove a SKU from a variation group.
- DELETE — Remove a SKU from your Amazon catalog entirely.
On top of this, SellerSheet can auto-discover the right product type from any ASIN, download the attribute template, fetch your existing listing data, validate before submitting, and even help you expand to new marketplaces — all without leaving Google Sheets.
Prerequisites
- Store Authorization: Authorize your Amazon store on the SellerSheet Dashboard.
- Sidebar Installed: Install the SellerSheet sidebar. See the Onboarding Guide.
- (Optional) Existing Data: For updating existing listings, fetch your current attributes first using Live Listings or Fetch Attributes by SKU/ASIN.
How the Sidebar Works
Every SellerSheet feature follows the same three-step pattern:
Go to the right sheet
Each feature has its own spreadsheet and sheet tabs.
Fill in the colored columns
Yellow = required, Light Yellow = optional, Gray = auto-filled.
Click the sidebar button
Buttons inside a dropdown only work on the matching sheet tab.
See the Sidebar documentation for the full guide.
Getting Started
Open the Create Listings spreadsheet from My Resources in the sidebar Home tab, or from your SellerSheet Google Drive folder. This spreadsheet contains several sheet tabs:
- Create Listings — The main sheet for all listing operations
- Live Listings — Fetch real-time listing data (see Live Listings guide)
- Listing Log — Save a backup of your Create Listings sheet data for later use
- Listings Restrictions — Check selling eligibility before adding ASINs
- Submission Log — Validation results, submission processing status, Feed IDs, and listing backups
Navigate to the Create Listings sheet tab and open the Create Listings dropdown in the sidebar.
Understanding the Sheet Layout
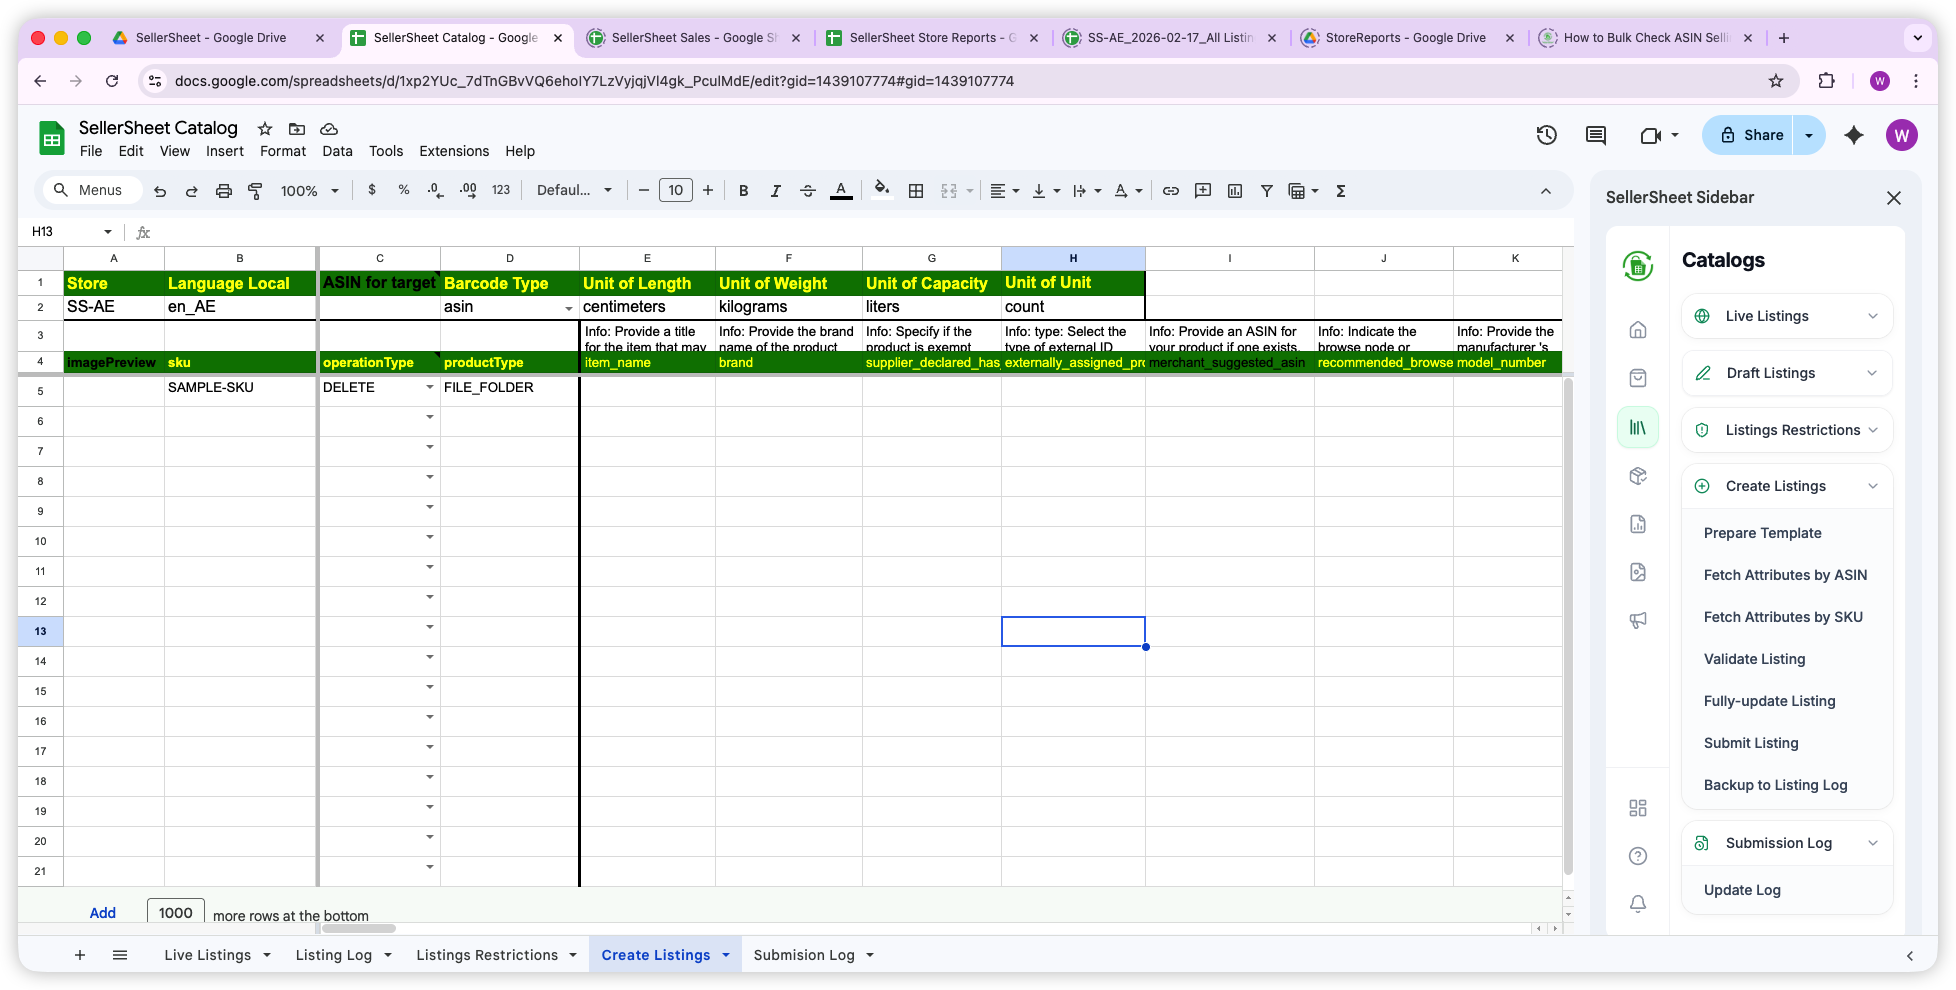
The Create Listings sheet has a specific row structure. Understanding it will save you time:
Sheet Row Structure
- Row 1: Configuration labels — Store (A), Language Local (B), ASIN for target node (C), Barcode Type (D), Unit of Length (E), Unit of Weight (F), Unit of Capacity (G), Unit of Unit Count (H).
- Row 2: Configuration values — Enter your store name (A2), language locale (B2), reference ASIN (C2), and default units (D2:H2) here.
- Row 3: Descriptions — Explanations and examples for each column header. Read these to understand what each attribute expects.
- Row 4: Column Headers —
imagePreview(A),sku(B),operationType(C),productType(D), then dynamic attributes (E+). Headers with yellow font are required. - Row 5+: Your listing data — one row per SKU.
Default Units (Row 2)
Row 2 sets default configuration and units for your listings. These apply to all rows so you don't need to type the unit in every single attribute cell. If a specific attribute needs a different unit, type it directly in that cell — it overrides the default.
- Store (A2): Your store identifier (e.g.,
SS-US). - Language Local (B2): Must match the store's marketplace (see below).
- ASIN for target node (C2): Optional — enter an ASIN to auto-discover the productType when using Prepare Template.
- Barcode Type (D2): Default barcode type — EAN, UPC, GTIN, or ASIN.
- Unit of Length / Weight / Capacity / Unit Count (E2:H2): Default measurement units for product dimensions.
Language Local
The Language Local (B2) must match your store's marketplace:
- en_US — United States
- en_CA — Canada
- en_GB — United Kingdom
- de_DE — Germany
- fr_FR — France
- en_AE or ar_AE — UAE
- es_MX — Mexico
Preparing Your Template
The Problem
You need to create listings but don't know the exact productType or which attributes Amazon requires. In Seller Central, you have to browse through categories, guess the right template, and download a massive flat file with hundreds of columns — most of which you don't need.
SellerSheet's Prepare Template button auto-discovers the right product type and downloads only the relevant attributes. There are three ways to use it:
1. By ASIN for Target Node (Easiest)
Find any existing ASIN on Amazon in the same category as the product you want to list. Enter it in the ASIN for target node cell (C2) and click Prepare Template. SellerSheet looks up the ASIN's productType automatically and downloads the full attribute template for that product category.
This is the best approach when you don't know the productType but can find a similar product on Amazon.
2. By productType (Direct Entry)
If you already know your productType — for example from the Live Listings sheet where it's shown for each fetched SKU — write it in the productType column (D5 onward). You can enter multiple different productTypes across rows, then click Prepare Template.
SellerSheet downloads each productType's template and merges them into a single comprehensive template with all attributes from every productType. Perfect for bulk operations across different product categories.
3. For Adding Existing ASINs (productType = PRODUCT)
If you just want to add an existing ASIN to your catalog — one that's already on Amazon — simply write PRODUCT as the productType. This is the simplest template and is all you need for matching existing products. Make sure to check selling eligibility first in the Listings Restrictions sheet.
For a step-by-step walkthrough, see the Bulk Add Existing ASINs guide — it covers checking eligibility, filling in SKUs, and submitting up to 50,000 ASINs in one batch.
Pro Tip: Combined Templates
When you enter multiple productTypes across rows, Prepare Template downloads each template and combines them into one comprehensive sheet. This means you get all required and optional attributes from every category in a single view.
Operation Types Overview
The operationType column (C) determines what SellerSheet does with each row. Here's a quick comparison:
| Operation Type | Purpose | What to Fill In | Best For |
|---|---|---|---|
| UPDATE | Create new listing or fully replace all attributes | All required attributes | New listings, full rewrites |
| PARTIAL_UPDATE | Update only the attributes you specify | SKU + ASIN + only changed attributes | Title, bullet points, price, image changes |
| PATCH | Partially delete attributes | SKU + specific attributes (real values) | Removing SKU from variation group |
| DELETE | Remove SKU from catalog | Just the SKU | Discontinuing products |
Workflow 1: Create New Listing or Full Update (UPDATE)
The Problem
You need to create dozens of new listings but Seller Central's flat file process is painful — download the template, fill in a massive CSV, upload, wait for the processing report, then fix errors one row at a time with no validation preview.
The UPDATE operation creates a new listing or fully replaces all attributes on an existing one. This requires filling in all required attributes.
Steps
- Prepare Template — Enter an ASIN in the ASIN for target node cell (C2) or a productType in D5, then click Prepare Template.
- Configure defaults — Set Store (A2), Language Local (B2), and default units (Barcode Type, Units of Length/Weight/Capacity/Unit Count in D2:H2).
- Set operationType — Write
UPDATEin the operationType column (C) for each row. - Fill in attributes — Complete all required attributes (yellow-font headers in Row 4). Row 3 has descriptions to guide you.
- Validate — Click Validate Listing in the sidebar for a dry-run preview. Results appear in the Submission Log sheet. Fix any issues.
- Submit — For fewer than 20 SKUs, click Fully-update Listing for instant processing. For 20+ SKUs, click Submit Listing for bulk submission via Amazon's feed queue.
Pro Tip: Validate Before You Submit
Validate Listing sends your data to Amazon for a dry-run without creating anything. It catches missing attributes, invalid values, and category errors before they affect your live account. This works with UPDATE and PATCH operations for fewer than 20 SKUs. Always validate before submitting.
Workflow 2: Update Specific Attributes (PARTIAL_UPDATE)
The Problem
You just need to update the title and bullet points for 50 listings. But with flat files, you have to fill in every required field — even the ones you're not changing. Miss one and Amazon overwrites your existing data with blanks.
PARTIAL_UPDATE only sends the attributes you fill in — everything else stays untouched. This is the safest way to make targeted changes.
Steps
- Set operationType to
PARTIAL_UPDATE. - Fill in SKU and the
externally_assigned_product_identifier(ASIN) column. - Fill in only the attributes you want to change — leave everything else blank.
- Click Submit Listing to send to Amazon.
Important: No Dry-Run for PARTIAL_UPDATE
Validate Listing does not support PARTIAL_UPDATE. You cannot preview partial updates before submitting. Double-check your attribute values carefully before clicking Submit Listing.
Frequently Updated Attributes
- item_name — Product title
- bullet_point — Bullet points / key features
- product_description — Product description
- generic_keyword — Backend search terms
- list_price / purchasable_offer — Pricing
- main_product_image_locator — Main image URL
- other_product_image_locator_1 through _8 — Additional images
- brand — Brand name
- manufacturer — Manufacturer
Pro Tip: Safer Than Full Update
PARTIAL_UPDATE only sends the attributes you fill in. You won't accidentally overwrite existing attributes with blank values — which is a common mistake with UPDATE or flat files.
Workflow 3: Remove SKU from Variation Group (PATCH)
The Problem
You need to split a SKU out of a variation family — maybe to move it to a different parent or to list it standalone. But doing this in Seller Central is nearly impossible without affecting the parent ASIN or the other children in the group.
The PATCH operation currently supports partially deleting attributes from a listing. Its primary use case is removing a SKU from a variation group while leaving the parent and other child SKUs untouched.
Steps
- Set operationType to
PATCH. - Fill in the SKU you want to remove from the variation.
- Fill in only these columns:
parentage_level— e.g.,childvariation_theme— e.g.,COLOR_NAME- The variation attribute itself — e.g.,
colorwith the real existing value
- Click Submit Listing.
Important: Use Real Values
When using PATCH, you must write the real existing values for the attributes. PATCH currently only supports partially deleting attributes. The SKU will be split from the variation group while the parent and other SKUs in the group remain unchanged.
Workflow 4: Delete SKU from Catalog (DELETE)
The DELETE operation permanently removes a SKU from your Amazon catalog.
- Set operationType to
DELETE. - Fill in the SKU(s) to delete.
- Click Submit Listing.
Important: Back Up First
This permanently removes the SKU from your catalog. Use the Backup to Listing Log button before deleting to save a snapshot of your current sheet data.
Submitting to Amazon
SellerSheet offers three sidebar buttons for sending your listing data to Amazon. All three log their results in the Submission Log sheet tab. Choosing the right button depends on how many SKUs you're submitting and whether you want instant feedback or bulk throughput.
| Button | Supported Operations | SKU Limit | Processing | Backup? | Best For |
|---|---|---|---|---|---|
| Validate Listing | UPDATE, PATCH | < 20 SKUs | Immediate (dry-run) | No | Preview errors before submitting |
| Fully-update Listing | UPDATE only | < 20 SKUs | Immediate | Yes | Small batches with instant result |
| Submit Listing | All types | Up to 50,000 SKUs | Amazon queue (Feed ID) | Yes | Bulk operations (≥ 20 SKUs) |
Validate Listing (Dry-Run Preview)
Validate Listing sends your data to Amazon for a dry-run validation without actually creating or modifying anything. Amazon checks every attribute and returns detailed errors if something is wrong — missing required fields, invalid values, category mismatches, etc. The result is logged in the Submission Log sheet with the Amazon response in the Processing Summary column.
Validate Listing only supports UPDATE and PATCH operation types, and works best with fewer than 20 SKUs where Amazon processes the validation immediately.
Fully-update Listing (Immediate Submit)
Fully-update Listing submits your data to Amazon and processes it immediately. This button only works with the UPDATE operation type and is designed for fewer than 20 SKUs. Amazon processes each listing in real time, so you get instant results — the processed result appears in the Processing Summary column of the Submission Log sheet. A snapshot of your submitted data is also saved as a backup (linked in the Listing Backup column).
Submit Listing (Bulk via Feed)
Submit Listing is the bulk submission method that supports all operation types (UPDATE, PARTIAL_UPDATE, PATCH, DELETE). It can handle up to 50,000 SKUs in a single submission as long as the total payload stays under 10 MB. It's recommended to use Submit Listing for any bulk operation.
When you click Submit Listing, your data enters Amazon's processing queue. Amazon returns a Feed ID which is saved in the Submission Log sheet, along with a snapshot backup (linked in the Listing Backup column). To check on the processing status and results:
- Go to the Submission Log sheet tab.
- Find your Feed ID in the log.
- Regularly click Update Log in the sidebar to refresh the processing status.
- When the status shows DONE, the processed result will appear in the Processing Summary column.
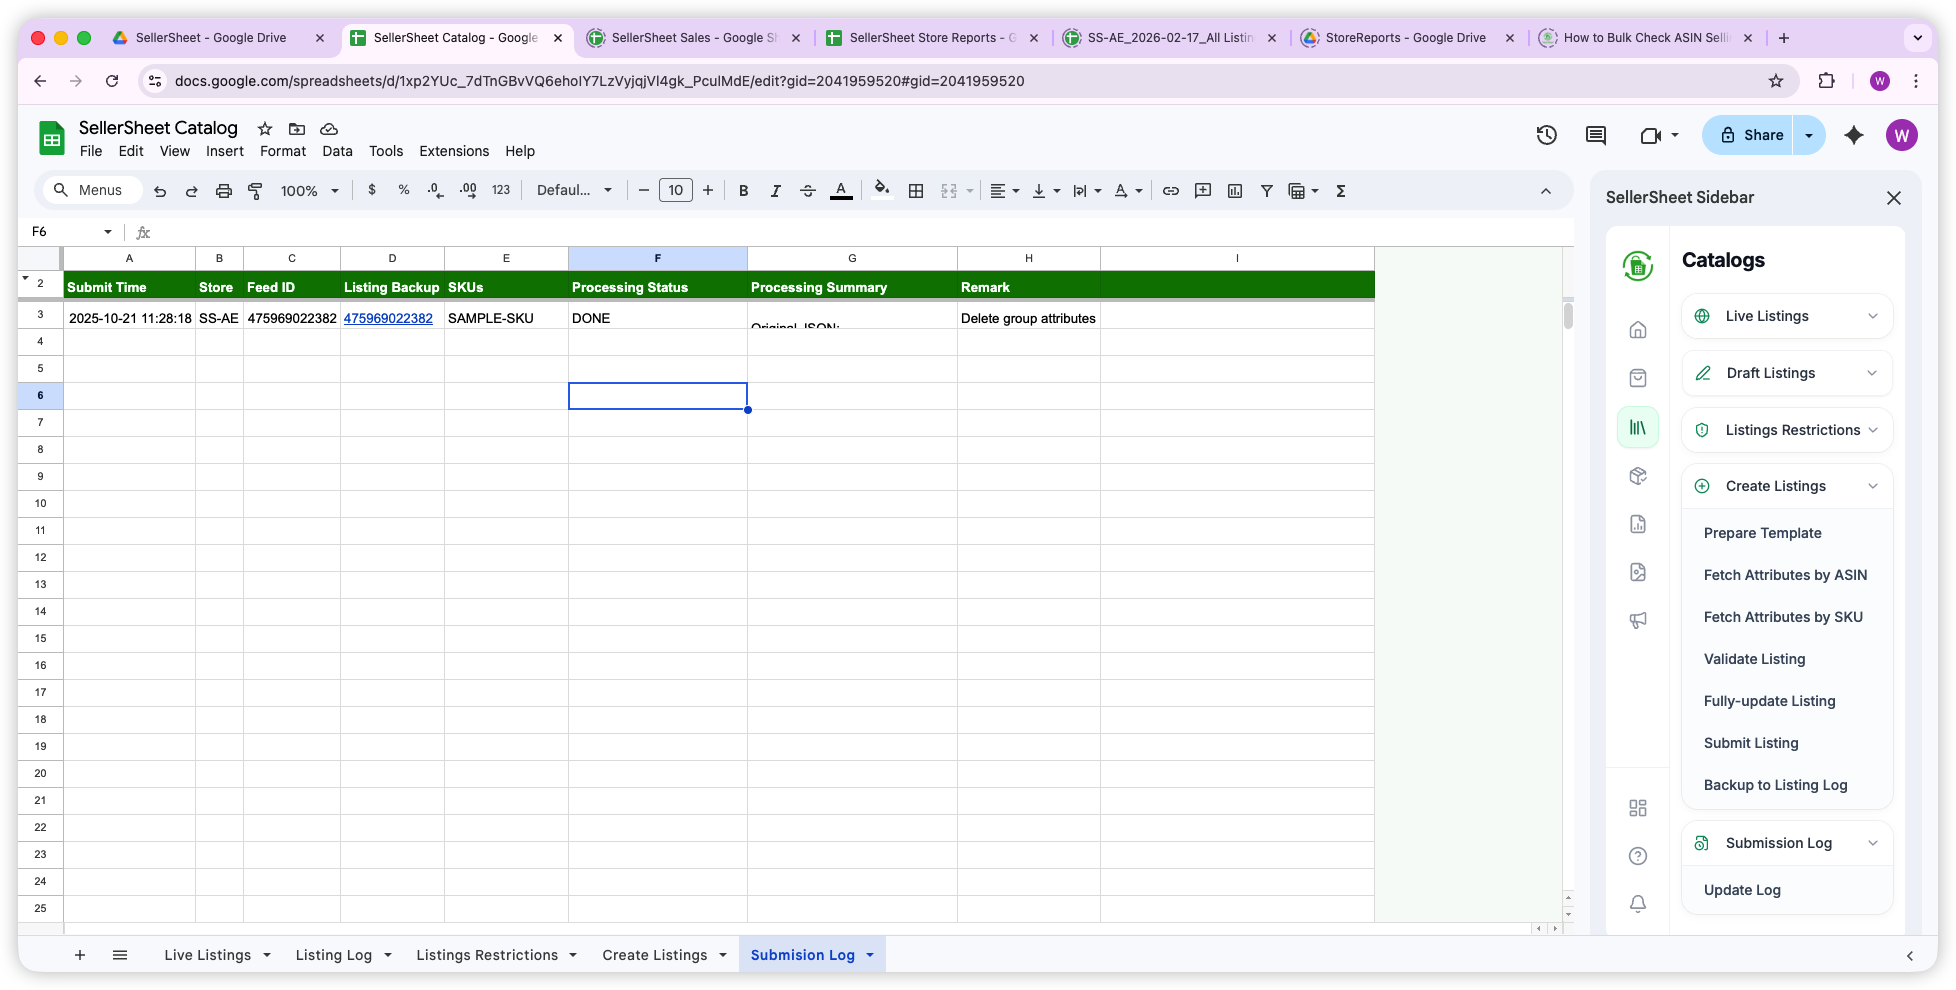
Submission Log Columns
- Submit Time: Timestamp of when the submission was made.
- Store: Which store the submission was sent to.
- Feed ID: Amazon's identifier for your submission (Submit Listing only). For Validate and Fully-update, this is empty since they process immediately.
- Listing Backup: Hyperlink to a snapshot copy of the data you submitted (Fully-update Listing & Submit Listing).
- SKUs: The SKU(s) included in the submission.
- Processing Status: Current status — shows
DONEwhen Amazon has finished processing. - Processing Summary: Amazon's processed result — a JSON response with success/error details for each SKU, item summaries, and issue counts.
- Remark: A free-text column for your own internal notes — use it to label submissions for easy tracking (e.g., "Delete group attributes").
Pro Tip: When to Use Which
For fewer than 20 SKUs, use Validate Listing first (dry-run), then Fully-update Listing for instant results. For 20+ SKUs or any bulk operation, use Submit Listing — it's designed for high-volume throughput and supports all operation types.
Important: Submit Listing Size Limits
Submit Listing accepts up to 50,000 SKUs per submission, but the total payload must stay under 10 MB. If your listings have many large attribute values (long descriptions, many images), you may need to split into multiple batches.
Backup to Listing Log (Manual Backup)
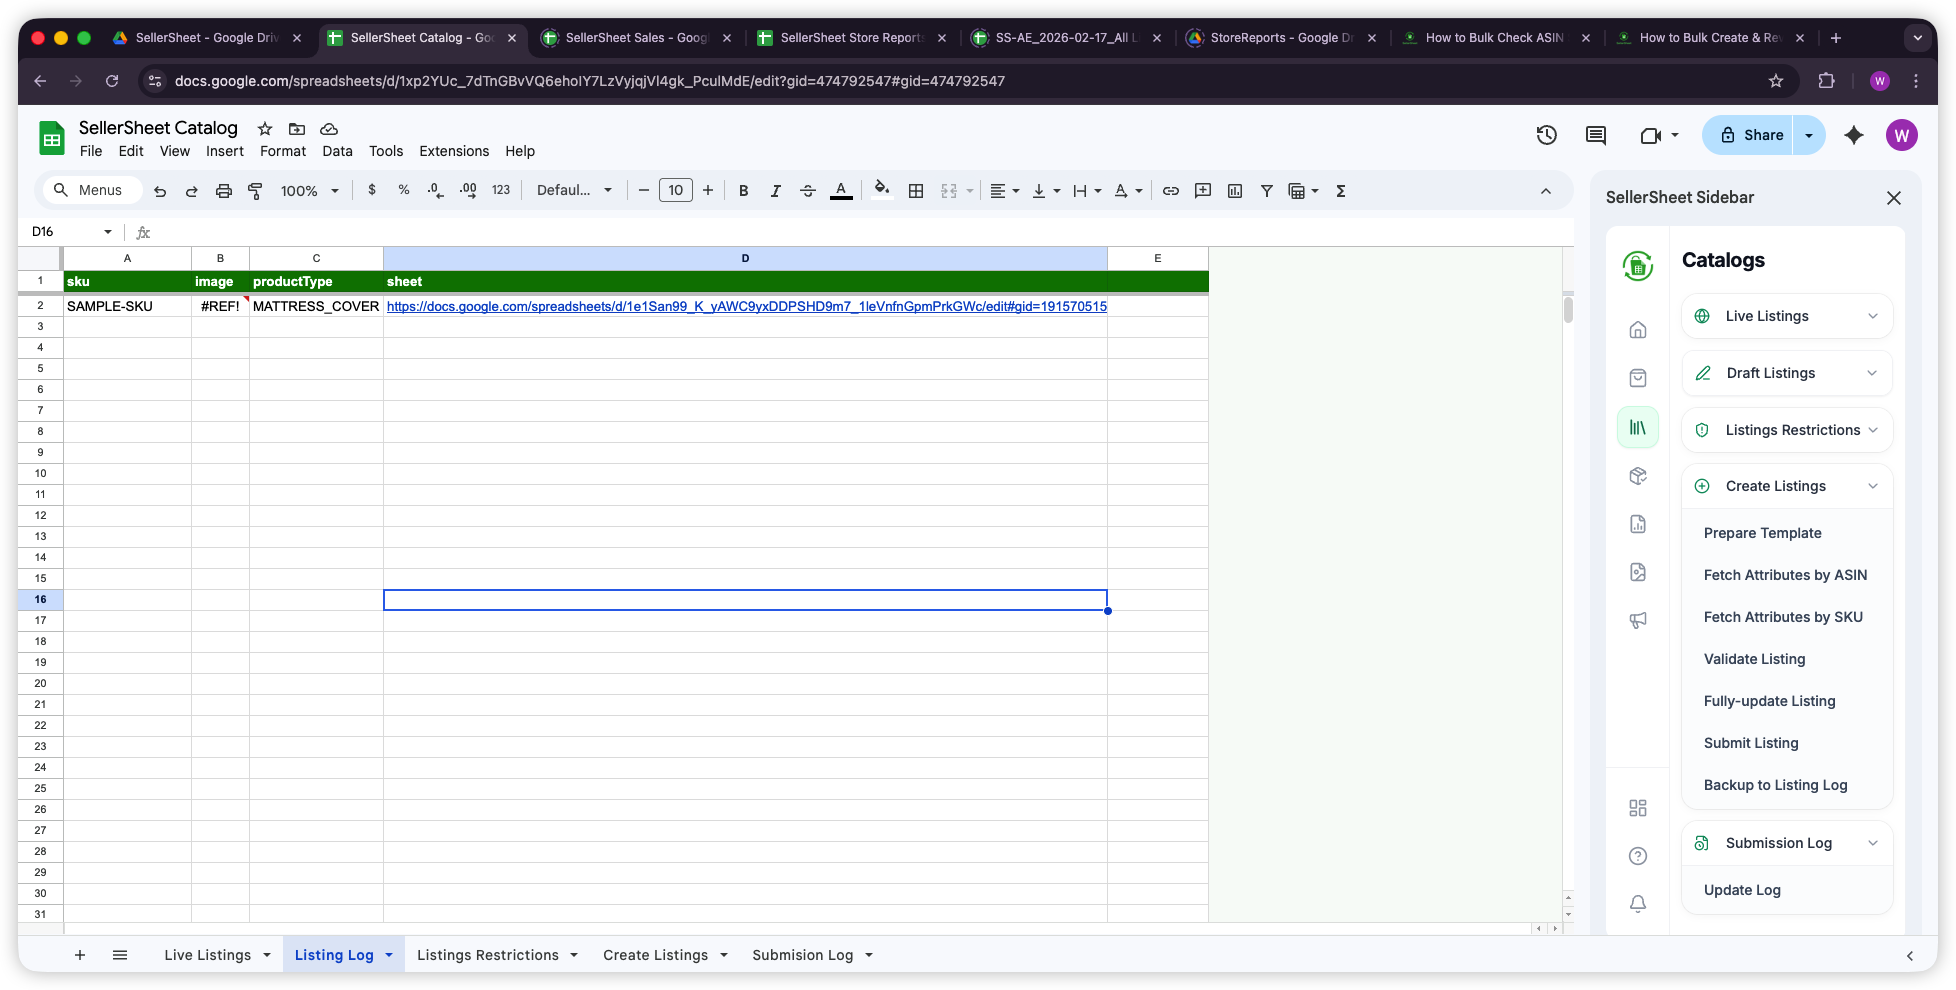
In addition to the automatic backups created by Fully-update Listing and Submit Listing, you can manually save a snapshot of your current Create Listings sheet by clicking Backup to Listing Log in the sidebar. This saves a copy to the Listing Log sheet — useful when you want to save your work but aren't ready to submit yet.
To restore a backup, click on the sheet hyperlink in the Listing Log's sheet column to open the saved copy, then use Extensions → SellerSheet → Useful Folder → Copy Current Sheet to Create Listings2 to restore it to the SellerSheet Catalog spreadsheet as a new Create Listings2 sheet tab, ready for submission.
Fetching Existing Attribute Data
Instead of typing every attribute manually, you can pull existing data directly from Amazon. There are three methods:
1. Fetch Attributes by SKU (Seller-Submitted)
Write your SKUs in the sku column, then click Fetch Attributes by SKU. This fetches the attributes as submitted by the seller — i.e., your own listing data from your catalog. It also auto-fills productType and ASIN.
Only works for SKUs that exist in your own catalog for the selected store.
2. Fetch Attributes by ASIN (Amazon-Accepted)
Write ASINs in the merchant_suggested_asin column, then click Fetch Attributes by ASIN. This fetches the attributes as accepted and displayed by Amazon — which may differ from what the seller submitted, since Amazon can merge contributions from multiple sellers.
Works for any ASIN on Amazon, not just your own listings.
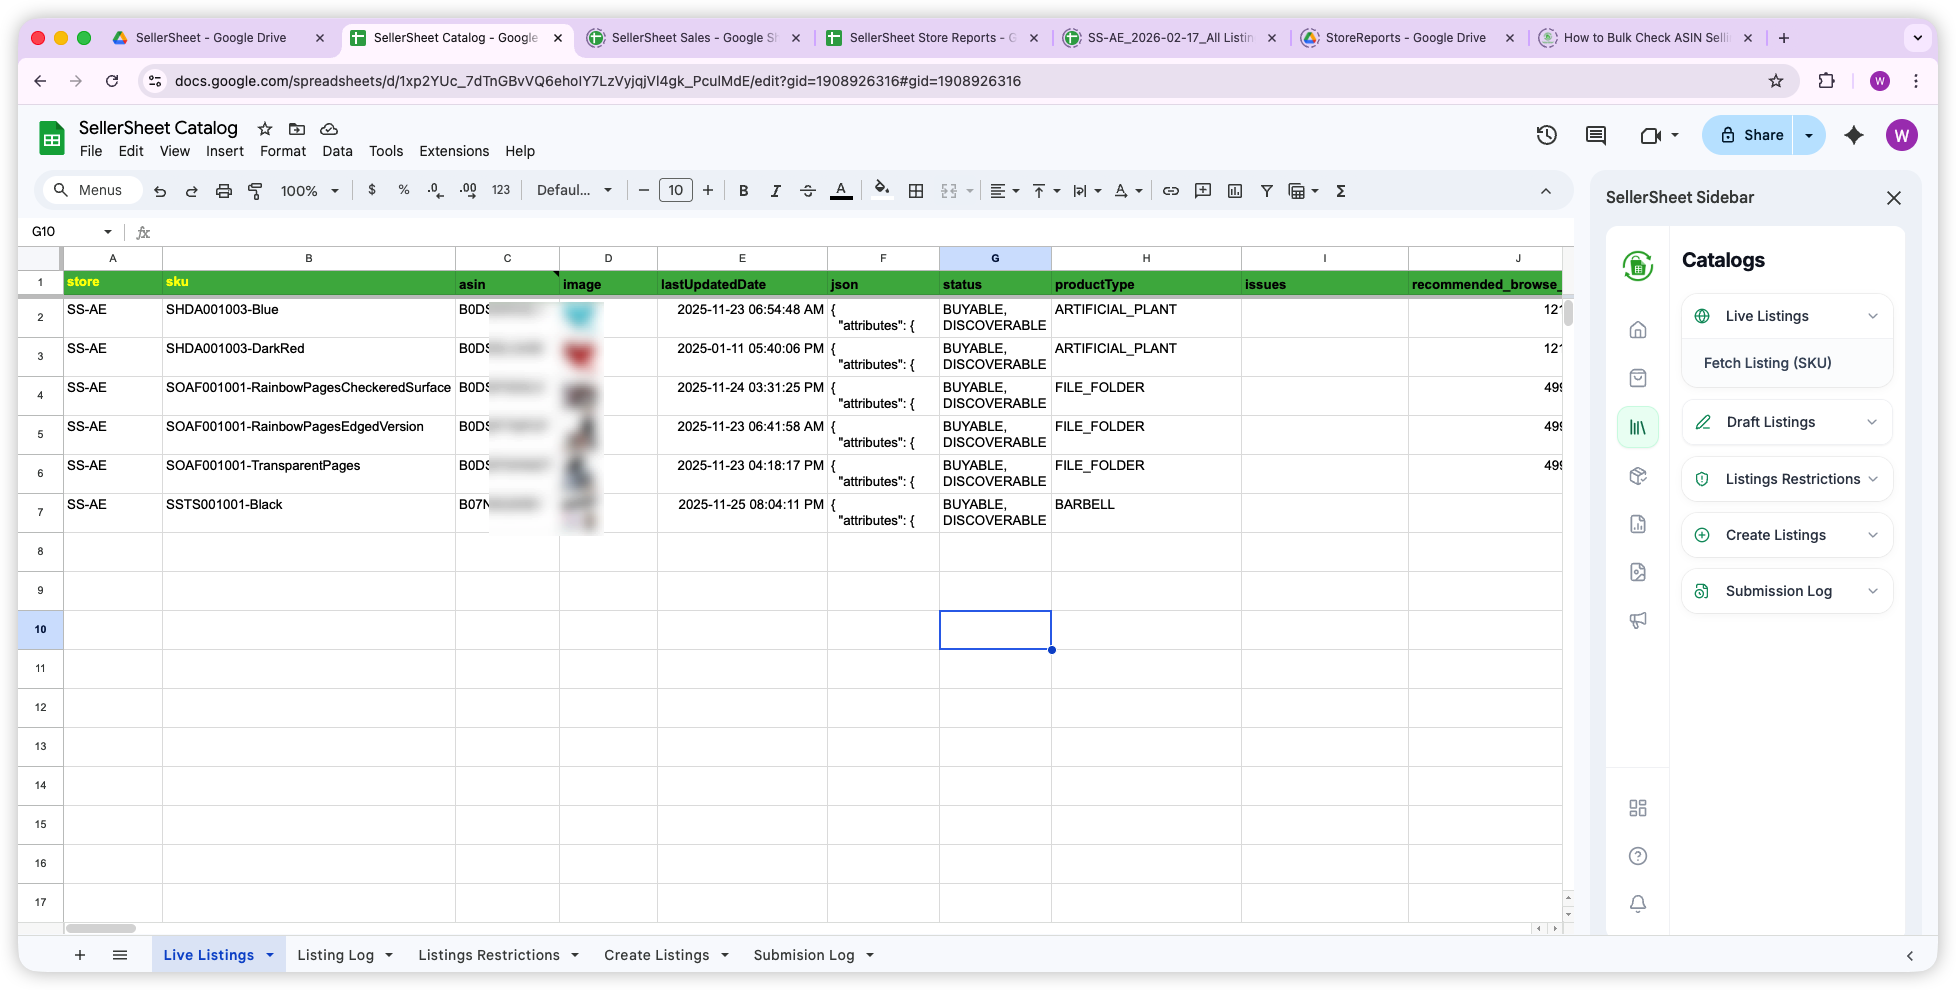
3. Paste JSON from Live Listings Sheet
The Live Listings sheet fetches real-time listing data for your SKUs, including the full attribute JSON in the json column. You can copy this JSON and paste it into the item_name column in the Create Listings sheet.
When you click Fully-update Listing, Submit Listing, or Validate Listing, SellerSheet auto-parses the JSON and maps each attribute to the appropriate column. This is the fastest way to populate all attributes at once.
JSON + Individual Attributes: Priority Rules
- Sheet attribute has a value: The sheet value is used directly — the JSON is ignored for that attribute.
- Sheet attribute is empty: The value from the JSON in
item_nameis used.
This means you can paste the full JSON into item_name as a baseline, then override specific attributes by typing values directly in their columns. Only the overrides you fill in will take priority.
json column and paste into item_name in Create ListingsSKU vs ASIN: What's the Difference?
- Fetch by SKU: Returns what the seller submitted. Only works for your own catalog.
- Fetch by ASIN: Returns what Amazon is displaying. Works for any ASIN. May include merged data from multiple sellers.
Creating Listings Across Marketplaces
The Problem
You sell in the US and want to expand to Canada, Mexico, UK, or Germany. But Build International Listings (BIL) in Seller Central is unreliable, gives you limited control over which attributes get translated, and often fails silently. Re-entering all listing data from scratch for each marketplace is equally tedious.
SellerSheet offers a cross-marketplace workflow with more control and higher success rate than BIL. You fetch your attributes from one marketplace and submit them to another — with full visibility into every attribute.
Recommended Workflow
- Set Store (A2) to your original store (e.g.,
MyStore-US) and enter your SKUs. - Click Fetch Attributes by SKU — this fetches all attributes + productType from your original store.
- Change Store (A2) to the target marketplace (e.g.,
MyStore-CA). - Click Prepare Template — downloads the target marketplace's attribute template (requirements may differ between marketplaces).
- Click Fetch Attributes by SKU again with original store — your existing attributes fill into the target marketplace template columns.
- Review: Any attributes that exist in the target marketplace but not in your original will be empty — easy to spot and fill in.
- Update Language Local (B2) to match the target marketplace.
- Click Validate Listing, fix issues, then Submit Listing.
Screenshot: Create Listings sheet with target marketplace store and attributes from original store
Pro Tip: Better Than BIL
This gives you full control over every attribute, unlike BIL which auto-translates and may miss marketplace-specific requirements. You can see exactly which attributes need attention and fix them before submitting.
Pro Tip: ASIN-Based Approach
You can also use Fetch Attributes by ASIN for a similar workflow — fetch from any ASIN on Amazon and submit to any marketplace. This is useful when you want to use a competitor's listing structure as a starting point.
Which Operation Type Should You Use?
Use this table to quickly choose the right approach:
| What You Need | Operation Type | Validate? | Submit Button |
|---|---|---|---|
| Create new listing (< 20 SKUs) | UPDATE | Yes | Fully-update Listing |
| Create new listings in bulk (20+ SKUs) | UPDATE | Yes | Submit Listing |
| Change only title/bullets/price/images | PARTIAL_UPDATE | No | Submit Listing |
| Remove SKU from variation group | PATCH | Yes | Submit Listing |
| Delete a SKU from your catalog | DELETE | No | Submit Listing |
| Add existing ASIN to your catalog | UPDATE | Yes | Submit Listing (productType = PRODUCT) |
| Expand to a new marketplace | UPDATE | Yes | Submit Listing |
Maximizing Efficiency
- Validate before every UPDATE/PATCH: Click Validate Listing before submitting. It's a free dry-run that catches errors without affecting your live listings. Works with UPDATE and PATCH for fewer than 20 SKUs.
- Use Submit Listing for bulk: For 20+ SKUs, always use Submit Listing. It supports up to 50,000 SKUs (under 10 MB) and works with all operation types. Check the Submission Log sheet and click Update Log to track processing status.
- Back up before major changes: Use Backup to Listing Log to save a snapshot of your current sheet data before making bulk updates or deletions.
- Use PARTIAL_UPDATE for routine changes: When updating titles, bullets, or prices, always prefer PARTIAL_UPDATE over UPDATE. It's safer — you won't accidentally overwrite existing attributes with blank values.
- Combine with Live Listings: Fetch your entire catalog via Live Listings, audit your data, then switch to Create Listings to fix issues or expand to new marketplaces.
- Prepare Template once, reuse across SKUs: Once you've prepared the template for a productType, add as many SKU rows as you need. No need to re-prepare for the same product category.
- Check restrictions before adding ASINs: Use the Listings Restrictions sheet to verify selling eligibility before attempting to add existing ASINs to your catalog.